What's GMBinder?
GM binder is a site that helps you create and layout homebrew rpg content.
You'll find the site at www.gmbinder.com
It is mainly oriented towards easily emulating D&D5 layout, but can be used for quite other different styles. Doing D&D5 is easy, so we will only talk about this in this tutorial.
Why use GMBinder?
If you are completely new to the layouting process of a book, RPG book being even harder to layout, it is a good place to start.GMBinder uses markdown for its primary content which is quite easy to learn, and allows you to use CSS and html for layouting purposes. Those skills are easy to develop using free online tutorials and can be a great asset on your resume (C.V.), so it's definitely not "lost time"
Hey ho ! Let's go !
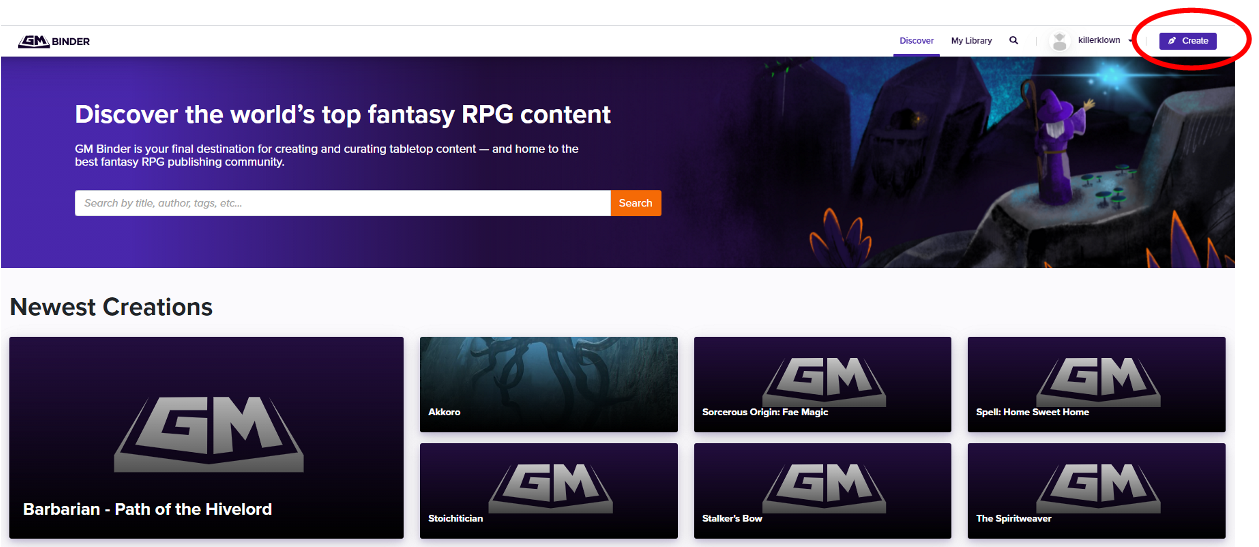
First you'll need an account. I won't show you that, you're not that stupid...- Create a new document
There is a button for that on the top right corner of the page

a) In the popup window, give it a name (you can change it later). I'm gonna make a book version of one of my blog posts.
I am a premium user, so I'm not sure if you can edit the document setting, but if not, it's OK to use the default anyway.
b) Just save the document settings.
- Erase everything
- You should read the stuff there before, but what you need is a fresh start.
Create your title
-
a) Click on snippets

b) Select "Part Header (PHB)" ant then click on "Insert"

In my document it will be :
<div class='partpage'>
# Fingal's Cave
##### Real places in RPG 05
</div>
small explanation:
outside of the <div class='partpage'> line starting with a # will behave like an HTML <h1> and
line starting with a ##### will behave like an HTML <h5>.
In our case, the class "partpage" brings a few extras (like centered text and the nice image around the title)
After the closing of the div, on a new line, add this text <br><br><br><br><br><br><br><br><br><br> (the number of times you need to insert <br> may vary)
It is not the best way to have the text not written under the title image, but it is the easiest one. (the better way is to use some <div>-tags)
- Write and organise your document
- Add an image
- Create a column break
- Create a page break
- Create list
- Insert a table
Now start writing your document.Start the Main categories with a "## " at the beginning of the line, and their undercategories with a "### " at the beginning of the line.
You can go further down through adding another # after that, up until 6#, but you probably won't need that much layers.
If you don't like one layer, let's say what the GM binder shows with ###, you can always just skip it.
What is important is CONSISTENCY ! All your titles at ##, and all your subtitles at ##### is OK, as long as you keep it consistent
Click again on snippets and select imagethe following text appears in your editor side:
<img src='image_url' class='image-location-top-right-bottom-left'>
Replace the 'image_url' part with a link to your image (you need to host it externally - i recommend imgbb.com, but there are several good alternatives)
Add in the tag : width='320' to have your image exactly the size of one column (if the image is too high, you can resize the image changing the 320 value)
In my document, the code looks like that: <img class="image-location-top-right-bottom-left" src="https://i.ibb.co/k1dy6fd/7-X-1-Strange-Marches-OD-D-Cover.png" width="320">
You can add a /columnbreak manually, to skip to the next column at a moment you deem appropriate. GM Binder's does it automatically (most of the times at least), but not really at the best point.
Try not to have a header or subheader alone at the bottom of the page, insert the column break before...
You can also add a column break with the snippet button or with the shortcut Ctrl+. (or Cnd+. on mac)
On a new column, if you are on the first page, you might need to add this text <br><br><br><br><br><br><br><br><br><br> at the beginning of the column too.
Try not to have a header or subheader alone at the bottom of the page, insert the column break before...
You can also add a column break with the snippet button or with the shortcut Ctrl+. (or Cnd+. on mac)
On a new column, if you are on the first page, you might need to add this text <br><br><br><br><br><br><br><br><br><br> at the beginning of the column too.
You can add a /pagebreak manually, to skip to the next page or /pagebreakNum to skip to the next page AND give the actual page a pagenumber.
Those can also be found as snippets and can be added with the shortcuts Ctrl+; (or Cnd+;) and respectively Ctrl+' (or Cnd+') on a US keyboard (I know for a fact that it's different on a german keyboard)
That's easy: just put a star (*) at the beginning of each line of the list for an unordered list (bullet points)For an ordered list (numbers), uses the corresponding button, five buttons farther to the right from "Snippets"
That's the trickiest i'll show you today.It's not particularly complicated, but it's time consuming...
a) There is a snippet for that (actually 2). Go there and select "Table".
As a default, the following text appears:
| d8 | Loot |
|:---:|:-----------:|
| 1 | 100gp |
| 2 | 200gp |
| 3 | 300gp |
| 4 | 400gp |
| 5 | 500gp |
| 6 | 600gp |
| 7 | 700gp |
| 8 | 1000gp |
First line is the table header.
Second line describes the orientation of the text in the table (|:...:| means centered, |:...| means justified left and |...:| means justified right)
each following line is a line in the table.
b) what about 3 column tables ?
You will then need to add manually pipes (|) to each line to have a 3 column table.
example:
| d8 | Loot |Magical?|
|:---:|:-----------:|:---:|
| 1 | 100gp |no|
| 2 | 200gp |no|
| 3 | 300gp |no|
| 4 | 400gp |no|
| 5 | 500gp |yes|
| 6 | 600gp |yes|
| 7 | 700gp |yes|
| 8 | 1000gp |yes|
With those basics, you should be able to create your first documents.
For details and cool shenanigans, i'll probably create new tutorials!
Have fun !
Create RPG stuff and share it !
For the ZIMO community, I've done a workshop on video, a kind of tutorial, of the basics of GMBinder:
I'll do another one with more advanced stuff next week, so if you liked this one, tune in next week to learn how to use GMB for any project, not just D&D stuff !


